Quantcast
Channel: EMC | Life of a Geek Admin
Viewing all 23 articles
Browse latest View live

How to Use SYMCLI in offline mode

$
0
0

Recently I made a job change and have delved into the Storage arena and supporting EMC storage products. One of the products is EMC Symmetrix . With that comes learning how to use the product and the syntax of the various commands. As to not cause any damage to the systems and learn found System Enabler can be used in offline mode installed on a Windows and Linux system.

SYMCLI is the most widely used EMC Symmetrix administration by most admins. For practicing symcli commands there is no symcli simulator available and of course we can not simply try commands in production.  Those who want to get familiar with symcli, can use symcli in offline mode. But SYMCLI offline mode is only with limited functionality and is good for testing configuration changes, scripts and how to use the tool.

For running SYMCLI in running in offline mode, we should have Solution Enabler installed in your desktop/laptop and should have a valid symapi_db.bin file (can be taken from production environment and is usually found in /usr/emc/API/symapi/db/symapi_db.bin ). We can download the solution enabler from support.emc.com. You will need an account to be able to download System Enabler. In this post we will be installing SE 7.6.2.56.

First we have to install the Solution Enabler in your desktop. SE installation is very easy and is similar to any other software installation. We can select the base version for installation.

emcse01

Click Next

emcse02

Click Next

emcse03

Click Next, Typical is good.

emcse04

Click Next.

emcse05

Click Install

emcse06

Click Finish

Once the installation is completed we have to copy the symapi_db.bin file to C:Program Files\EMC\SYMAPI\db directory.

Now we have to set the below values to the environmental variables SYMCLI_DB and SYMCLI_OFFLINE . In this example I do not want to have to define the values everytime so we will set them as permanent variables. Open a command prompt and type.

setx SYMCLI_DB “c:\Program Files\EMC\SYMAPI\db\symapi_db.bin” /M
setx SYMCLI_OFFLINE “1” /M

emcse07

Close the command prompt and open a new one so the variables we set are now available. Run the set command we will now see them.

emcse08

Once done, we can start running symcli commands by changing directory to c:\Program Files\EMC\SYMCLI\bin

cd c:\Program Files\EMC\SYMCLI\bin

emcse09

And that is all you need to do!


How To Use Device-Alias on a Cisco MDS

$
0
0

As I continue on my journey of learning how to manage storage I have learned about using device aliases instead of pwwn’s directly. The benefit to using device-alias in this manner makes it easy when a device has new pwwn’s assigned to it (due to hardware replacement or in the case of a blade a move to a new chassis) that you can update the device-alias and not have to make any other storage assignments or changes.

To create a device alias, you’ll use the device-alias database command in global configuration mode. Once you are in database configuration mode, you can create device aliases using the device-alias command, like this:

fc1 # config
fc1(config)# device-alias database 
fc1(config-device-alias-db)# device-alias name <Friendly name> pwwn <Fibre Channel WWPN> 
fc1(config-device-alias-db)# exit

Now that we have defines our device aliases you must also commit the changes to the device alias database.

fc1(config)# device-alias commit

This commits the changes to the device alias database and makes the device aliases active in the switch. To view our changes just use the following command

fc1 # show device-alias database

Another benefit is once you create a device alias it will now show in any cpommands that display the pwwn. For example if we want to show what pwwn are active in a zone.

# show zone name VNXMYZONE active
zone name VNXMYZONE vsan 1
* fcid 0x8a9856 [pwwn xx:xx:xx:xx:xx:xx:xx:xx] [DEVICE-1]
* fcid 0x8xyzpd [pwwn xx:xx:xx:xx:xx:xx:xx:xx] [VNX1-B4]

You can also create device aliases for your target devices in the same manner. The use of the device alias alos makes it easy to add members to zones. In this example we are creating a zone and adding using device aliases.


config
zoneset name Fabric1_VSAN1 vsan 1
zone name VNXMYZONE
member device-alias DEVICE-1 initiator
member device-alias VNX1-B4 target
exit
zoneset activate name Fabric1_VSAN1 vsan 1
zone commit vsan 1

A few other commands that are handy as well. Need to delete a device-alias or rename it?

Removes the device name for the device that is identified by its pwwn.

fc1(config-device-alias-db)# no device-alias name device-name

Renames an existing device alias with a new name.

fc1(config-device-alias-db)# device-alias rename old-device-name new-device-name

Hope this helps you as much as it has helped me!

Creating Cisco MDS 9700 Switch Configuration Backup Scheduled Job

$
0
0

Scenario

Recently was tasked with creating a scheduled job to backup  the running-config on our Cisco MDS9710 switch and TFTP it to another server. It was a great task to learn a bit about the scheduling piece in the switch and what command can be run.

Create the Job

First is to get the switch on config mode
mds-sw1# config

Next create a job called backup-cfg
mds-sw1(config)# scheduler job name backup-cfg

Now let’s start adding commands. In this case we will be creating a copy of the running-config, making a copy of it with the latest time stamp to bootflash and finally tftp it.

mds-sw1(config-job)# copy running-config startup-config
mds-sw1(config-job)# copy running-config bootflash:/$(SWITCHNAME)-cfg.$(TIMESTAMP)
mds-sw1(config-job)# copy bootflash:/$(SWITCHNAME)-cfg.$(TIMESTAMP) tftp://1.2.3.4/$(SWITCHNAME)-cfg.$(TIMESTAMP)

Note: You can run the command for the job definitions in a single line. You must have a space before the ; to separate the commands.

Example: copy running-config startup-config ;copy running-config bootflash:/$(SWITCHNAME)-cfg.$(TIMESTAMP) ;copy running-config tftp://1.2.3.4/$(SWITCHNAME)-cfg.$(TIMESTAMP)

We are done creating the job let’s exit
mds-sw1(config-job)# exit

Schedule the Job

While we are still in config mode let’s schedule the job to run at 7:00 PM and cal the schedule daily.
Create the schedule named daily.
mds-sw1(config)# scheduler schedule name daily

Associate the job called backup-cfg to it.
mds-sw1(config-schedule)# job name backup-cfg

Set the time to run at 7:00PM.
mds-sw1(config-schedule)# time daily 19:00

All done, let’s exit.
mds-sw1(config-schedule)# exit
mds-sw1(config)# exit

Validation

Let’s check our work and see if it looks good.
mds-sw1# show scheduler config

config terminal
feature scheduler
scheduler logfile size 16
end

config terminal
  scheduler job name backup-cfg
copy running-config startup-config
  copy running-config bootflash:/$(SWITCHNAME)-cfg.$(TIMESTAMP)
  copy running-config tftp://1.2.3.4/$(SWITCHNAME)-cfg.$(TIMESTAMP)

end

config terminal
   scheduler schedule name daily
     time daily 19:00
     job name backup-cfg
end

That’s all there is to it. So last we can wait until the job runs then the next morning run the command show scheduler logfile and it will show us any errors from the job running.


How to Setup iSCSI on Windows 2008 R2

$
0
0

Here is one of those topics you do not see much, sure there are basics on setting up the Microsoft iSCSI Initiator but what about the details in adding the whole thing, well here it it is!.

Overview

In this post we will be configuring a NIC just for accessing the storage, configuring the iSCSI Initiator, then adding the storage to the server.

Configure the iSCSI NICS on Server

Before we can configure the iSCSI Initiator we need to make sure that there are NIC’s configured on the same vlan as the iSCSI target.  Preferred is to have two NIC’s for fault tolerance. The setup is the same as with any other NIC’s on the server with the exception that you do not want this to register in DNS.

iscsi1

Rename the Adapters for easy identification at a later date. For this instance we have named them iSCSI LAN1 and iSCSI LAN2. This is an optional step, your call.

Start iSCSI Initiator Service

First we need to enable and start the Microsoft iSCSI service. Here are several ways to access Microsoft iSCSI service.

  • Click Start, click Control Panel, click Classic View, and then click iSCSI Initiator.
  • Click Start, click Administrative Tools, and then click iSCSI Initiator.
  • Click Start, in Start Search, type iSCSI, and then in Programs, click iSCSI Initiator.
  • Click Start, click Control Panel, in the search field, type iSCSI, and then in Administrative Tools, click iSCSI Initiator.

Start the service and then change Startup Type from Manual to Automatic.

iscsi2

While we are there we need to get the IQN.

Every iSCSI initiator and target must have a worldwide unique name. Typically, this is an iSCSI qualified name (IQN). A single IQN applies to all iSCSI HBAs on the server, including Microsoft iSCSI Initiator. You should not configure an iSCSI HBA to have a different IQN than the IQN that is used by other iSCSI HBAs and Microsoft iSCSI Initiator; they must all share the same IQN name.

Microsoft iSCSI Initiator automatically chooses an IQN that is based on the computer name and the Domain Name System (DNS). If the names of the computer or DNS are changed, the IQN also changes. However, an administrator can specifically configure the IQN to be a fixed value instead of the IQN that is generated. If the administrator specifies a fixed IQN name, that name must be maintained as worldwide unique.

iscsi3

Click on the Configuration tab and copy the IQN number generated by Microsoft. At this point we are ready to configure the storage. Your storage administrator will need to have the IQN information for configuration of the host on the iSCSI server. Once completed we are ready to attach the storage to the server.

Add Storage

Open Control Panel and click on iSCSI Initiator. Now we are going to add the target initiators, the iSCSI storage server. Type in ip address of the target initiator and click Quick Connect.

iscsivnx12

The Quick Connect screen will appear and if a successful connection occurs you will now see the iqn for the iSCSI server.

iscsivnx13

Click Done. While in the same screen, click on Connect. Check Enable multi-path box, then click Advanced. We need to set a few settings for the first connection.

iscsivnx14

Fix the advanced settings for the target.

iscsivnx15

Select the following.

Local Adaptor: Microsoft iSCSI Initiator

Initiator IP: <your servers storage NIC>

Target proxy IP: <select the target ip of the iSCSI server>

Click OK to save the changes then OK again to save the check box changes  and this will put us back to the  iSCSI settings.

From the example above we have added the first IP address for SPA. So now we need to add the second SPA address. While still on the targets tab and the only IQN is highlighted click the Connect button. This will bring up the same advanced / Connect to target dialog as before. Click the Enable multi-path box and click Advanced. The settings in advanced are now going to point to the other NIC for the iSCSI target.

Click OK, then OK and once again we will be back at the targets. Now we need to add iSCSI target SPB  to the targets. Use the same process as when iSCSI SPA target  were added and the second NIC for the Initiator IP. When you are done your targets should look like this.

iscsivnx16

Now that we have added the storage and the iSCSI is configured on the host we will be able to format and see the storage on the server. If you are using EMC PowerPath. We should see the disk showing.

iscsivnx17

Our final step is to bring the disk online, initialize it and format it. Open Server Manager and expand Storage and click on Disk Management. The service will re-scan the disk and find the new storage. Right click on the new disk and click bring online. Right click again and select Initialize Disk. A box will popup, select GPT and click OK.

We are now ready to format the disk. Right click on the un-formatted disk and select New Simple Volume. Select a drive letter and click next. This next part is crucial. If this is for Microsoft Exchange or Microsoft SQL Server, the allocation unit size must be set to 64k for best performance. Otherwise, leave it at default. Fill in the volume label and click OK.

That is all there is to it, you have successfully added iSCSI storage to a Windows 2008 R2 server.


How To Remove a Device Tag on a Recoverpoint TDEV

$
0
0

Learned a new tidbit today on removing device tags on EMC VMAX and RecoverPoint. Before you can reclaim a TDEV you must first remove the Device Tag.

Overview

In this post we will cover how to remove the device tag, disable write access, un-map, un-bind the device and dissolve the meta on EMC VMAX that is using Recoverpoint


Remove the Device Tag

First get the tag information:

$ symdev -sid <Symmetrix ID> show <device list or device
range>

Look for Device Tag(s) in the output

Device Status : Ready (RW)
Device SA Status : Ready (RW)
Device User Pinned : False
Host Access Mode : Active
Device Tag(s) : RecoverPoint

Syntax to un-tag devices

$ symconfigure –sid <Symmetrix ID> -cmd “set dev <device list or device
range> attribute=NO RCVRPNT_TAG;” commit


Rerun and now we see it states none

$ symdev -sid <Symmetrix ID> show <device list or device
range> | grep -i "Device Tag"
Device Tag(s) : None

Write_Disable Device

Now that we have removed the Device tag we can write_disable

$ symdev -sid <Symmetrix ID> write_disable <device list or device
range>

Un-map the Device

Once we have completed the write disable it is time to unmap the TDEV.

$ symconfigure -sid <Symmetrix ID> -cmd "unmap dev <device list or device
range> from dir ALL:ALL;" -v commit

Un-bind the Device

Once the umap process is complete it is time to unbind the TDEV from the thin pool. First get it from the output of the symdev command and look for the Bound Thin Pool Name.

$ symdev -sid <Symmetrix ID> show <device list or device
range> | grep -i "Bound Thin Pool Name"
Bound Thin Pool Name : SATA_1tb_R6

Now that we have the needed information we can unbind the TDEV.

$ symconfigure -sid <Symmetrix ID> -cmd "unbind tdev <device list or device
range> from pool SATA_1tb_R6;" -v commit

Dissolve the Meta’s

Now that the un-binding has occured we can dissolve the meta’s

$ symconfigure -sid <Symmetrix ID> -cmd "dissolve meta dev <device list or device
range> ;" commit

That is all there is, the TDEV has been untagged and removed.


How to Remove a TDEV on EMC VMAX

$
0
0

Introduction

So you are doing some cleanup on your VMAX and need to remove a few TDEV volume’s in a Storage Pool and want to free this space to create a new volume or expand an existing volume.

In this post we will detail how to delete a single TDEV volume in a Storage Group. An example of such a configuration is in the case where a single TDEV was mapped and used as a dedicated server volume with no other volumes being present in the Storage Group. Scenario: It this case we are decommissioning a Server and we are reclaiming the space used in the Storage Pool.

Steps to Accomplish:

  • Delete the SERVER Masking View
  • Remove SERVER  volume (TDEV) from Storage group
  • Delete the SERVER  Storage Group
  • Disable read / write on the TDEV
  • Unmap the TDEV from the FA ports
  • Unbind TDEV from Pool
  • META Volume Dissolve
  • Delete the Device

In order to view the list of all TDEV’s created in the Pool (SERVER pool):

$ symcfg -sid xxx list -tdev -gb -thin -pool SERVER

List all TDEVs in the system

$ symcfg -sid xxx list -tdev

Delete the SERVER Masking View

List the all the views:

$ symaccess -sid xxx list view

Remove the SERVER_MV Masking View:

$ symaccess -sid xxx delete view -name SERVER_MV

Remove SERVER  volume (TDEV) from Storage group

View the details of the storage group SERVER_SG in order to gather the correct dev ID (for example 1234):

$ symaccess -sid xxx list -type STORAGE
$ symaccess –sid xxx show SERVER_SG -type storage

Remove the dev 0234 from the Storage Group:

$ symaccess -sid xxx -name SERVER_SG -type storage remove devs 1234

Delete the SERVER  Storage Group

$ symaccess -sid xxx -name SERVER_SG -type storage delete

Disable read / write on the TDEV

$ symdev -sid xxx write_disable 1234

If you require to change the status of all the devices in a SG:

$symsg -sid xxx -sg SG-Name write_disable

Unmap the TDEV from FA ports

$symconfigure -sid xxx -cmd “unmap dev 1234;” preview
$ symconfigure -sid xxx -cmd “unmap dev 1234;” commit

If you require to Unmap a range of devs:

$ symconfigure -sid xxx -cmd “unmap dev 1234:1236;” commit

Unbind TDEV from Pool

$ symconfigure -sid xxx -cmd “unbind tdev 1234 from pool SERVER;” preview
$ symconfigure -sid xxx -cmd “unbind tdev 1234 from pool SERVER;” commit

Check if the Unbind was successful:

$ symcfg -sid xxx list -tdev -gb -thin -pool SERVER

Once the TDEV is unbound all pointers to the data pool are removed and those tracks that were consumed by the TDEV are marked as available space in the SERVER Pool.
If you require to Unbind a range of devs:

$ symconfigure -sid xxx -cmd “unbind tdev 1234:1235 from pool SERVER;”

Dissolve Meta Volume

$ symconfigure -sid xxx -cmd “dissolve meta dev 1234;” preview
$ symconfigure -sid xxx -cmd “dissolve meta dev 1234;” commit

Delete the Device

$ symconfigure -sid xxx -cmd “delete dev 1234;” preview
$ symconfigure -sid xxx -cmd “delete dev 1234;” commit

If you require to Delete a range of devs:

$ symconfigure -sid xxx -cmd “delete dev 1234:1235;” commit

Comfirm Delete was successful:

$ symcfg -sid xxx list -tdev

that is all there is to it. The space has been reclaimed and can be re-allocated.

How To Use Consistent_Lun setting on VMAX Initiator Groups

$
0
0

Introduction

Using the consistent_lun setting we eliminate the issue where different devices show different lun id’s. This is more prevalent with ESX Hosts. For this to work the flag must be set at creation time of the host and parent initiator groups.  In this post we will cover how to complete the task.

Step 1 – Create Host Initiator Groups

The first step is to create the host initiator groups using the symaccess command

$ symaccess -sid <sid> create -name MYSERVER01_IG -type initiator -consistent_lun -wwn 50060b0000c2abcd
$ symaccess -sid <sid> -name MYSERVER01_IG -type initiator -wwn 50060b0000c2be0e add

Use the -detail flag to see that it is switched.

$ symaccess -sid <sid> show MYSERVER01_IG -type initiator -detail

Symmetrix ID :<symmetrix_sid>
Initiator Group Name : MYSERVER01_IG Last update time : 12:55:44 PM on Thu Sep 24,2015 Group last update time: 12:55:44 PM on Thu Sep 24,2015 Port Flag Overrides : No Consistent Lun : Yes

Step 2 – Create Parent Initiator Groups

Now that we have created the host initiator group and have set the consistent_lun flag we need to create the parent initiator group and set the consistent_lun flag as well. In this example we are creating we are creating a parent initiator group called ESX_PROD_WINDOWS_IG and assigning three host initiators to the group, all of which were created using the consistent_lun flag.

$ symaccess -sid <sid> create -name ESX_PROD_WINDOWS_IG -type initiator -consistent_lun -ig MYSERVER01_IG
$ symaccess -sid <sid> -name ESX_PROD_WINDOWS_IG -type initiator -ig MYSERVER02_IG add
$ symaccess -sid <sid> -name ESX_PROD_WINDOWS_IG -type initiator -ig MYSERVER03_IG add

As with the Host initiator group we can use -detail to validate the group was created correctly.

$ symaccess -sid <sid> show ESX_PROD_WINDOWS_IG -type initiator -detail

Symmetrix ID : <symmetrix_sid>

Initiator Group Name : ESX_PROD_WINDOWS_IG
Last update time : 01:19:40 PM on Thu Sep 24,2015

Group last update time: 01:19:40 PM on Thu Sep 24,2015

Port Flag Overrides : No
Consistent Lun : Yes

Group Name : MYSERVER01_IG
User-generated Name : N/A
FCID Lockdown : N/A
Heterogeneous Host : N/A
Port Flag Overrides : N/A
CHAP Enabled : N/A
Type : Initiator Group

Group Name : MYSERVER02_IG
User-generated Name : N/A
FCID Lockdown : N/A
Heterogeneous Host : N/A
Port Flag Overrides : N/A
CHAP Enabled : N/A
Type : Initiator Group

Group Name : MYSERVER03_IG
User-generated Name : N/A
FCID Lockdown : N/A
Heterogeneous Host : N/A
Port Flag Overrides : N/A
CHAP Enabled : N/A
Type : Initiator Group

Errors

If you try to add a host initiator group that does not have the consistent_lun flag you will be stopped from adding and will get the following error.

$ symaccess -sid <sid> -name ESX_PROD_WINDOWS_IG -type initiator -ig MYSERVER04_IG add

The operation will result in consistent lun violation

Conclusion

As we can see using the consistent_lun flag we can force consistency with lun id’s when storage is shared between many hosts. This is a good practice as it reduces the amount of possible data corruption and access errors hen used.

How to List the TDEV Members of a META on VMAX

$
0
0

Introduction

So you have created a META and have come to a point where you need to know what TDEV are a member. Either need it for reclaiming of space or any other option.In this post we will explore several commands to get the information you are looking for.

Get META Members from a META

First list all the meta’s that are in use on the VMAX and look for the device you are interested in getting data on. You do this by running the command.

$ symdev -sid <vmax_sid> list -meta

tdev_meta_1

Now we have a list of all the META’s on the VMAX, from here we can use a TDEV  entry in the Sym column of the output for more information. So we move on to the next command.


Show details for a META

Getting the details is a simple symdev command to the device properties. Run the command.

$ symdev -sid <vmax_sid>show 320F

Look for Meta Device Members

 Meta Device Members (20) :
{
----------------------------------------------------------------------
BCV DATA RDF DATA
---------------------------- --------------------------
Sym Cap Std Inv BCV Inv Pair R1 Inv R2 Inv Pair
Dev (MB) Tracks Tracks State Tracks Tracks State
----------------------------------------------------------------------
--> 320F 204803 - - N/A - - N/A
3210 204803 - - N/A - - N/A
3211 204803 - - N/A - - N/A
3212 204803 - - N/A - - N/A
3213 204803 - - N/A - - N/A
3214 204803 - - N/A - - N/A
3215 204803 - - N/A - - N/A
3216 204803 - - N/A - - N/A
3217 204803 - - N/A - - N/A
3218 204803 - - N/A - - N/A
3219 204803 - - N/A - - N/A
321A 204803 - - N/A - - N/A
321B 204803 - - N/A - - N/A
321C 204803 - - N/A - - N/A
321D 204803 - - N/A - - N/A
321E 204803 - - N/A - - N/A
321F 204803 - - N/A - - N/A
3220 204803 - - N/A - - N/A
3221 204803 - - N/A - - N/A
3222 204803 - - N/A - - N/A
----------------------------------------------------------------------
4096050 - - - -
}

tdev_meta_2

Another way to get a list of META’s and their members is by using the following command

$ symdev -sid <vmax_sid> list -tdev

In the output of the command the device that is the META head will have a uppercase “M” and all it’s members will be listed below with a lowercase “m” as well as a – for the Cap (MB), only the META head will show a value in Cap. In this example

tdev_meta_3

tdev_meta_4

Conclusion

As we can see we can easily get the META information needed for operations on VMAX.


Retrieving EMC and Qlogic Fiber WWN on RHEL

$
0
0

Introduction

So you need to add storage to a RHEL (RedHat Enterprise Linux) server and the storage guy has asked you for the WWN.  The question next is how do I get the WWN off my server? So how do we get QLogic and EMC WWN’s on RHEL. It is a lot easier than one might think. Let’s move forward and get the WWN information we need!

Qlogic

First identify your installed or recognized, this is accomplished using the lspci command and grepping for fibre.

$ sudo lspci | grep -i fibre
21:00.0 Fibre Channel: QLogic Corp. ISP2432-based 4Gb Fibre Channel to PCI Express HBA (rev 02)
23:00.0 Fibre Channel: QLogic Corp. ISP2432-based 4Gb Fibre Channel to PCI Express HBA (rev 02)

Qlogic Cards are identified as FC Hosts so their information is kept in /sys/class/fc_host/hostX directory where X is a number for each host the OS sees, example: host0, host1, etc…

Now that we know we have an Qlogic card we know that /sys/class/fc_host/ is the location of our fibre card information. there are a few ways we can get the data. We can look at the contents of the /sys/class/fc_host/ directory and go into each sub-directory and get the data.

$ sudo cat /sys/class/fc_host/host1/port_name
0x2100001b32051cf9

$ sudo cat /sys/class/fc_host/host2/port_name
0x2100001b3205a7f8

Another way is to grep all of them at once by using regular expressions. and using [1-2] in the place where X goes. If you have multiple cards change the range of the numbers in [].

$ sudo cat /sys/class/fc_host/host[1-2]/port_name
0x2100001b32051cf9
0x2100001b3205a7f8

Emulex

First identify your installed or recognized, this is accomplished using the lspci command and grepping for fibre.

$ sudo lspci | grep -i fibre
21:00.0 Fibre Channel: Emulex Corporation Zephyr-X LightPulse Fibre Channel Host Adapter (rev 02)
23:00.0 Fibre Channel: Emulex Corporation Zephyr-X LightPulse Fibre Channel Host Adapter (rev 02)

EMC Cards are identified as SCSI Hosts so their information is kept in /sys/class/scsi_host/hostX directory where X is a number for each host the OS sees, example: host0, host1, etc… Buried in a few sub-directories there is a file called port_name and that is where the WWN’s reside.

Now that we know we have an Emulex (EMC) card we know that /sys/class/scsi_host/ is the location of our fibre card information. there are a few ways we can get the data. We can look at the contents of the /sys/class/scsi_host/ directory and go into each sub-directory and get the data.

$ sudo cat /sys/class/scsi_host/host1/device/fc_host\:host1/port_name
0x10000000c97df226

$ sudo cat /sys/class/scsi_host/host2/device/fc_host\:host2/port_name
0x10000000c97df05f

Another way is to grep all of them at once by using regular expressions. and using [1-2] in the place where X goes. If you have multiple cards change the range of the numbers in [].

$ sudo cat /sys/class/scsi_host/host[1-2]/device/fc_host\:host[1-2]/port_name
0x10000000c97df226
0x10000000c97df05f

Conclusion

Now that wasn’t so bad, was it? So with a few simple commands we have retrieved the WWN information from or RHEL server. You can use this process on RHEL 5, 6 & 7 releases as well as any derivatives including CentOS, Scientific Linux, etc…).


How To Install and Config PowerPath on RHEL

$
0
0

Introduction

PowerPath is EMC licensed software for managing SAN attached storage on your systems. In this post we will cover how to install, license and scan for newly attached storage.

Prerequisites

Download the PowerPath software from EMC powerlink website. If you’ve purchased EMC support, you should have access to powerlink.

For RHEL 4

EMCpower.LINUX-5.3.0.00.00-185.rhel.x86_64.rpm

EMCpower.LINUX-5.3.0.00.00-185.rhel.i386.rpm

For RHEL 5 / 6

5.7.SP5/EMCPower.LINUX-5.7.5.00.00-002.RHEL5.x86_64.rpm

5.7.SP5/EMCPower.LINUX-5.7.5.00.00-002.RHEL6.x86_64.rpm

Installation

# rpm -ivh EMCPower.LINUX-5.7.5.00.00-002.RHEL5.x86_64.rpm
Preparing... ########################################### [100%]
1:EMCpower.LINUX ########################################### [100%]

All trademarks used herein are the property of their respective owners.
NOTE:License registration is not required to manage the CLARiiON AX series array.

Start the Power path service

# /etc/init.d/PowerPath start

Register EMC Powerpath

Before you can use the EMC powerpath software, you should register it using the EMC Powerpath License key received when you purchased the software from EMC.

Use emcpreg tool to install EMC Powerpath license key as shown below.

# emcpreg -install

=========== EMC PowerPath Registration ===========
Do you have a new registration key or keys to enter?[n] y
Enter the registration keys(s) for your product(s),
one per line, pressing Enter after each key.
After typing all keys, press Enter again.

Key (Enter if done): **emc-powerpath-license-key**
1 key(s) successfully added.
Key successfully installed.

Key (Enter if done):
Key is invalid, ignored.
Try again or press Enter if done.
1 key(s) successfully registered.
Verify EMC Powerpath Registration

Use EMC powermt command to check the registration as shown below.

# powermt check_registration

Key **emc-powerpath-license-key**
Product: PowerPath
Capabilities: All


Scan for storage

In this example we are using an Emulex fiber card and the device is contained in  /sys/class/scsi_host/. To get the fiber card to go out and scan for any added storage. There are several ways to accomplish this task.

# cd /sys/class/scsi_host/
# echo "- - -" >

My favorite using a for loop.

# cd /sys/class/scsi_host/
# for i in `ls`; do echo "- - -" > $i/scan; done

Next steps are to make PowerPath update the luns. This is done suing the powermt command.

# powermt update lun_names
# powermt config
# powermt save


Now display what was found and can proceed to mount and use the storage.

# powermt display dev=all

Conclusion

As we can see, by installing and using EMC Powerpath application on RHEL we can effectivly manage SAN attached storage.

How To Remove SAN Attached LUNs from RHEL 5 Servers Using powermt

$
0
0

Introduction

It is one of those rare occasions where you get to reclaim SAN attached storage instead of giving more. From the EMC side of it you would think no problem. Remove the host from the storage group and un-mount and re-scan on the host and all is good, right? Well no, up rises device in use or not found and powermt check command won’t work. So how do we do it? Read on and see.

Steps

Several steps are needed to disconnect the storage from RHEL 5 / 6 server.

First edit /etc/fstab and comment out the related storage. Save the file.

Now we need to un-mount the storage. the is done using the umount command.

$ sudo umount /oracle/arch

Now that we have un-mounted the storage we need to remove the logical volume, volume group and physical group for the SAN attached storage.

First find the logical volumes using the lvs command

$ lvs
LV                     VG                             Attr        LSize
lvoraarch         vg_lp59_oraarch -wi-ao     145.00G
lvoradata         vg_lp59_oradata -wi-ao    169.00G
lvoradata2       vg_lp59_oradata2 -wi-ao   175.00G

Now using the lvremove command we can delete the logical volume.

$ sudo lvremove lvoraarch

Now that the logical volume we can delete the associated volume group. This is done with the vgremove command. From the previous step and the output from lvs command we know the volume group name, but before we remove the volume group we need to get the physical device name. We can get this running the pvs command.

$pvs
PV                               VG                           Fmt   Attr      PSize       PFree
/dev/cciss/c0d0p3  vg00                       lvm2   a--       278.25G 191.75G
/dev/emcpowerb      vg_lp59_oraarch lvm2   a--       50.00G 0

From the output we see /dev/emcpowerb is the physical device for volume group vg_lp59_oraarch. So now we can delete the volume group

$ sudo vgremove vg_lp59_oraarch

Now we can remove the physical device. This is completed with the pvremove command.

$ sudo pvremove /dev/emcpowerb

So we are now clean on the host side. Login to the storage server (VNX, VMAX) and remove the host from the storage group or the LUN in the storage group. Once completed log back into the server.

Run

powermt check

to clean all dead paths on the system to complete the process.

Conclusion

An issue has been averted and storage reclaimed in a few easy steps on RHEL. Hope this little tip helps you in your endeavors.

How to Upgrade Avamar Client on Solaris

$
0
0

Introduction

This post explains how to upgrade an existing Avamar client installation on Solaris. It covers removal and installation of the client on Sparc and x86 for Solaris 8, 9 & 10. This shown using an older package version but the process is the same.

Process

Copy the updated package on the server in the /tmp directory on the target server. For Solaris 8 & 9 use the Solaris 8 package and make sure to match the correct architecture (sparc or x86).

Stop the Avamar client:

/etc/init.d/avagent stop

Copy configuration information before removal:

create /tmp/avamar_backup
copy the following files to /tmp/avmar_backup:
/opt/AVMRclnt/var/avagent.cfg
/opt/AVMRclnt/var/cid.bin

Remove the existing client:
me@srvsq02 # pkgrm AVMRclnt

The following package is currently installed:
AVMRclnt Avamar Client
(sparc) 4.1.106-27

Do you want to remove this package? [y,n,?,q] y

## Removing installed package instance <AVMRclnt>

This package contains scripts which will be executed with super-user
permission during the process of removing this package.

Do you want to continue with the removal of this package [y,n,?,q] y
…..
…..
…..bunch of stuff happens…..
Removal of <AVMRclnt> was successful.

Cd to directory where the new client exists and install it.

pkgadd -dAvamarClient-solaris8-sparc-6.0.101-66.pkg

The following packages are available:
1 AVMRclnt Avamar Client
(sparc) 6.0.101-66

Select package(s) you wish to process (or ‘all’ to process
all packages). (default: all) [?,??,q]: all

Processing package instance <AVMRclnt> from </tmp/AvamarClient-solaris8-sparc-6.0.101-66.pkg>

Avamar Client
(sparc) 6.0.101-66

This software is copyright EMC Corporation, 2001-2010.

Please read and agree to the End User License Agreement which
will be placed in the base directory of the install as a file
named AvamarClient-License.txt.

Relocate install from /opt/AVMRclnt? [n] <RETURN>
Directory to locate cache & log files [/var/avamar]: <RETURN>
WARNING! Directory “/var/avamar” already exists!
Confirm ‘/var/avamar’ is the desired location. [n] y
## Executing checkinstall script.
Using </opt> as the package base directory.
## Processing package information.
## Processing system information.
## Verifying package dependencies.
## Verifying disk space requirements.
## Checking for conflicts with packages already installed.
## Checking for setuid/setgid programs.

This package contains scripts which will be executed with super-user
Permission during the process of installing this package.

Do you want to continue with the installation of <AVMRclnt> [y,n,?] y

Installing Avamar Client as <AVMRclnt>

## Executing preinstall script.
## Installing part 1 of 1.
/opt/AVMRclnt/AvamarClient-License.txt
/opt/AVMRclnt/bin/avagent.bin
/opt/AVMRclnt/bin/avregister
/opt/AVMRclnt/bin/avscc
/opt/AVMRclnt/bin/avtar
/opt/AVMRclnt/bin/avtar.bin
/opt/AVMRclnt/bin/unix.pin
/opt/AVMRclnt/etc/AvamarClient-UpdateReplace.sh
/opt/AVMRclnt/etc/avagent.d
[ verifying class <apps> ]
/opt/AVMRclnt/lib/libDDBoost.so
/opt/AVMRclnt/lib/libstdc++.so.2.10.0
[ verifying class <libs> ]
## Executing postinstall script.
Installation complete
You may run /opt/AVMRclnt/bin/avregister to register and activate this client with the Administrator server.
avagent Info <5241>: Logging to /opt/AVMRclnt/var/avagent.log
avagent Info <5417>: daemonized as process id 26881
avagent.d Info: Client Agent started.

Installation of <AVMRclnt> was successful.

Stop the agent:

me@srvsq02 # /etc/init.d/avagent stop

avagent Info: Stopping Avamar Client Agent (avagent)…
avagent Info: Client Agent stopped.

Copy configuration information :
copy the following files from /tmp/avmar_backup to:
from /tmp/avamar_backup/avagent.cfg to /opt/AVMRclnt/var/avagent.cfg
from /tmp/avamar_backup/cid.bin to /opt/AVMRclnt/var/cid.bin

Start the agent:

me@srvsq02 # /etc/init.d/avagent start

Installation is now completed.

Conclusion

You now have successfully upgraded the Avamar client on a Solaris server and have retained the settings.

Using EMC PowerPath Migration Enabler for Storage Migrations on Windows

$
0
0

Introduction

This post covers the use of PowerPath Migration Enabler to migrate files and programs from old to new disks without interruption on Windows servers. If you are migrating to new storage, this is a very handy thing to have. You must have PowerPath 5.7 SP2 or higher installed with the PowerPath Migration Enabler license key enabled on the host.
Process

The Process

Before we start you will need to get disk information for the for new and old disks. Using the Windows Disk Management tool you will need to get the disk number and the corresponding hard disk number from PowerPath. We will also need to make sure our target drive is online only in Windows Disk Management.

Open Windows Disk Manager and rescan disks to see the new storage allocated to the system. Look for the current disk and the new disk and mak note of the disk number that Windows reports for them.

Now we need to get the PowerPath information. Open a command prompt and issue the powermt command to output the results to a file for viewing.

C:\ >powermt display dev=all > c:\support\ppdisplay.txt

Look in the results of the powermt output for the two disks and note the name PowerPath references it. It should be  harddisk. For instance harddisk6 is the old disk (source) and harddisk74 is the new disk (target).

Now that we have the correct disk information we can setup the migration. This is done using the powermig command.

C:\>powermig setup -src harddisk6 -tgt harddisk74 -techtype hostcopy
Setup migration? [yes]/no: yes
Migration Handle = 1

Next we should query the migration handle to verify the migration state.

C:\>powermig query -handle 1
Handle: 1
 Source: harddisk6 (50.00 GB, thin)
 Target: harddisk74 (100.00 GB, thin)
 Technology: HostCopy
 Migration state: setup
 Throttle Value: 2

We are looking good, let’s start the migration by starting the sync process. This will start syncing the data to the target drive without interruption.

C:\>powermig sync -handle 1
Start sync for handle 1 ? [yes]/no: yes

Let’ query and verify it is syncing and what percentage has completed.

C:\>powermig query -handle 1
Handle: 1
 Source: harddisk6 (50.00 GB, thin)
 Target: harddisk74 (100.00 GB, thin)
 Technology: HostCopy
 Migration state: syncing
 Throttle Value: 2
 Percent InSync: 0% (224.50 MB copied)
 Sync Start Time: Tue Jan 26 16:12:15 2016
 Total Sync Time: 17 seconds
 Recent Throughput: 13.21 MB/s (224.50 MB in 17 seconds)
 Estimated Time To Completion (using recent throughput): 1h4m20s
 Estimated Completion Time: Tue Jan 26 17:16:52 2016

Syncing has started and we see the throttle value is set at 2, which is 30% and estimated time is over an hour. To increase the throttle we can change it without interruption. For example a value of 0 will set the throttle to 100% n will greatly reduce the syncing time, but at the sametime may increase the I/O being consumed and can possibly cause issues, where as a throttle value of 1 will set the throttle at 60% but take bit less time than the default of 30%. So let’s say a value of 0 is good, so to change it we use the throttle -throttlevalue option.

C:\>powermig throttle -throttlevalue 0 -handle 1

Now let’s query our changes and see the difference. If you are happy with the changes just keep an eye on the system and query until syncing has completed.

C:\>powermig query -handle 1
Handle: 1
 Source: harddisk11
 Target: harddisk26
 Technology: HostCopy
 Migration state: sourceSelected
 Percent InSync: 100%
 Throttle Value: 2

Sync is done and we see now the Migration status is sourceSelected., time to flip to new device to the target device.

C:\>powermig selecttarget -handle 1
Transition to targetSelected state? [yes]/no: yes

Run a query and verify the changes have occurred.

C:\>powermig query -handle 1
Handle: 1
 Source: harddisk6 (50.00 GB, thin)
 Target: harddisk74 (100.00 GB, thin)
 Technology: HostCopy
 Migration state: targetSelected
 Throttle Value: 0
 Sync Start Time: Tue Jan 26 16:12:15 2016
 Sync End Time: Tue Jan 26 16:35:19 2016
 Total Sync Time: 23m4s
 Overall Average Throughput: 36.99 MB/s

All looks good, let’s commit the changes to the new storage.

C:\>powermig commit -handle 1
Commit migration? [yes]/no: yes

We are now done, let’s cleanup the migration.

C:\>powermig cleanup -handle 1
Cleanup migration? [yes]/no: yes

Verify the job is done by issuing the info option to verify all jobs are done.

C:\>powermig info -all
No migrations found.

Conclusion

Using PowerPath Migration Enabler we can safely and without interruption migrate old to new storage on our Windows servers.

How to Change FA Ports on an Existing VMAX PortGroup

$
0
0

Introduction

You have a situation on your VMAX where the port utilization is up and you would like to move the FA ports assigned to a PortGroup moved to a lesser utilized set on you switch. In this post we will cover how to move to a new port group and fix the mapping of all attached devices on your EMC VMAX. We will cover unmapping ports and fixing zoning.

Process

First part of the puzzle to create new zones for the new ports we are moving the system to use.

There are several steps we need to accomplish to add new FA Ports and remove the old ones from our PortGroup.

Add the new ports to the existing port group

symaccess -sid 1234-type port -name MYCLUSTER_PG add -dirport 9F:0,11F:0,6F:0,8F:0
Now we can remove the ports
 symaccess -sid 1234 -name MYCLUSTER_PG -type port -dirport 5F:0,7F:0,10F:0,12F:0 remove

The final configuration piece is to unmap the FA ports to the Storage devices. We can retrieve the devices by using the storage group.

symdev -sid 1234 write_disable 12C5 -SA 5F -p 0

Repeat the command for each port you want to disable

symdev -sid 1234 write_disable 12C6 -SA 5F -P 0
symdev -sid 1234 write_disable 12C6 -SA 7F -P 0
symdev -sid 1234 write_disable 12C6 -SA 10F -P 0
symdev -sid 1234 write_disable 12C6 -SA 12F -P 0
Check the device to see that the port is write disable.

symdev -sid 1234 show 12C6

Front Director Paths (8):
 {
 ----------------------------------------------------------------------
 POWERPATH DIRECTOR PORT LUN
 --------- ---------- ---- -------- ---------
 PdevName Type Type Num Sts VBUS TID SYMM Host
 ----------------------------------------------------------------------
 Not Visible N/A FA 05F:0 WD 000 00 02B N/A
 Not Visible N/A FA 06F:0 RW 000 00 012 N/A

So now we see FA 05F:0 is in a disabled state and we can now proceed with unmapping the Ports from the device.

Using the symconfigure command unmap the device from the dirport. We will need

symconfigure -sid 1234 -cmd "unmap dev 12C5 from dir 5F:0;" -v commit

Conclusion

We see that we can add and disable FA ports for a device with ease and no outages.

Using EMC PowerPath with Oracle ASM

$
0
0

Introduction

This post explains how to configure and use EMC PowerPath with Oracle ASM for clustered Oracle RAC servers running on RHEL 6.4 or higher servers.
Oracle ASM ensures consistent naming of devices across RAC clusters, and also maintains permissions on devices across reboots, a feature that was important until UDEV rules were added to Linux with the 2.5 kernel.
EMC PowerPath is an advanced multi-pathing host based solution that works with EMC arrays to intelligently load balance I/O across all available paths as well as provide fault tolerance by automatically re-routing traffic around failed paths. EMC PowerPath is significantly more powerful and robust that native Linux MPIO.
A feature of ASM is that devices stamped for ASM are assigned an alias. Each disk will be added to the /dev/oracleasm/disks/ device directory, and presented to ASM using the alias ORCL:diskname.
When Linux sees multiple paths to the same disk or LUN, it creates an entry in the SCSI device table for each path. Therefore a single LUN with two paths may appear to Linux as both /dev/sdg and /dev/sdh.
This is problematic for ASM, since ASM cannot natively handle two or more devices mapping to the same LUN.
Like ASM, EMC PowerPath also creates aliases, called pseudo-devices. One pseudo-device is assigned to cover all SCSI devices or paths that map back to the same LUN. EMC PowerPath pseudo-devices will have the naming convention /dev/emcpowerX where X is the device letter.

Process

One of the main issues to address with RHEL servers in a cluster is the EMC pseudo names need to match. We can see the pseudo names by running powermt display dev=all command.

[ linuxodb02 scsi_host ] # powermt display dev=all
Pseudo name=emcpowera
Symmetrix ID=000195702256
Logical device ID=1B79
Device WWN=60000970000195702256533031423739
state=alive; policy=SymmOpt; queued-IOs=0
==============================================================================
————— Host ————— – Stor – — I/O Path — — Stats —
### HW Path I/O Paths Interf. Mode State Q-IOs Errors
==============================================================================
1 lpfc sde FA 7e:00 active alive 0 0
1 lpfc sdd FA 5e:00 active alive 0 0
0 lpfc sdc FA 10e:00 active alive 0 0
0 lpfc sdb FA 12e:00 active alive 0 0

Pseudo name=emcpowerb
Symmetrix ID=000195702256
Logical device ID=1B8A
Device WWN=60000970000195702256533031423841
state=alive; policy=SymmOpt; queued-IOs=0
==============================================================================
————— Host ————— – Stor – — I/O Path — — Stats —
### HW Path I/O Paths Interf. Mode State Q-IOs Errors
==============================================================================
1 lpfc sdm FA 7e:00 active alive 0 0
1 lpfc sdk FA 5e:00 active alive 0 0
0 lpfc sdi FA 10e:00 active alive 0 0
0 lpfc sdg FA 12e:00 active alive 0 0

If we run the command on both hosts we will see the pseudo names are different. Here is how we address that issue.

Shutdown PowerPath on one of the clustered nodes.

$ sudo /etc/init.d/PowerPath stop

Now that PowerPath is stop we need to copy PowerPath configuration files from node one to node two. Copy /etc/emcp_devicesDB.dat and /etc/emcp_devicesDB.idx to the /etc directory on the node. Once the copy is complete start PowerPath (sudo /etc/init.d/PowerPath start) up and run the powermt display dev=all command and the pseudo names will match.

Now we match and are ready to make changes to /etc/sysconfig/oracleasm. The directives ORACLEASM_SCANORDER and ORACLEASM_SCANEXCLUDE need to be modified as follows:

# ORACLEASM_ENABLED: ‘true’ means to load the driver on boot.
ORACLEASM_ENABLED=true

# ORACLEASM_UID: Default user owning the /dev/oracleasm mount point.
ORACLEASM_UID=grid

# ORACLEASM_GID: Default group owning the /dev/oracleasm mount point.
ORACLEASM_GID=oinstall

# ORACLEASM_SCANBOOT: ‘true’ means scan for ASM disks on boot.
ORACLEASM_SCANBOOT=true

# ORACLEASM_SCANORDER: Matching patterns to order disk scanning
ORACLEASM_SCANORDER=”emcpower

# ORACLEASM_SCANEXCLUDE: Matching patterns to exclude disks from scan
ORACLEASM_SCANEXCLUDE=”sd

Now when ASMLib starts, it will scan for ASM disks among the PowerPath pseudo-devices instead of the SCSI devices.


How to Collect Clariion VNX SPCollects via Unisphere

$
0
0

Overview

As a storage administrator there are times in which EMC support asks for SP Collects. As a new administrator this maybe a new request, no worries here are the steps to collect the information.

Process

To collect the SPCollects via the Unisphere GUI, follow these steps:

  • Log in to the CLARiiON/VNX via Unisphere.
  • On the Dashboard screen, select the CLARiiON/VNX system you wish to generate SPCollects from.
  • On the System Information screen there is a Task panel containing SPA Tasks and SPB Tasks.

spcollects1

  • To generate SPCollects for SPA:

spcollects2

  • Select Generate Diagnostic Files from the SPA Tasks panel.
  • A confirmation window will appear, select Yes to start the SPCollect script now.
  • Click OK to confirm the task successfully starts.
  • The SPCollect script may take several minutes to complete. To verify the SPCollect creation for SPA:
    • Select Get Diagnostic Files from the SPA Tasks panel.
    • The SPA File Transfer Manager window will appear.
    • Enlarge the SPA File Transfer Manager window and resize the Files On SP panel for easier browsing.
    • Click twice on the Date column in the Files On SP panel to show the most recently created files first. Enlarge the Name column so that the full file names can be read.
    • If the SPCollect script is still running, you will see a file of the format {SERIAL NO}_SPx_YYYY-MM-DD_HH_MM_SS_runlog.txt which corresponds to the array serial number, SP id and the date and time (GMT) that the SPCollect script was started on the SP.
    • Wait a few minutes and click on Refresh to update the Files On SP display.
    • When the SPCollect script has completed the Files On SP panel will show a file of the format {SERIAL NO}_SPx_YYYY-MM-DD_HH_MM_SS_xxxxx_data.zip which corresponds to the array serial number, SP id and the date and time (GMT) that the SPCollect script was started on the SP.
  • To retrieve the SPCollects from SPA:
    • In the SPA File Transfer Manager window from above, click on the required SPCollect zip file in the Files On SP panel.
    • In the Destination Directory panel, select the destination directory on the local host that the SPCollect should be transferred to.
    • Click on the Transfer button at the bottom of the File On SP panel to begin the file transfer operation.
    • A confirmation window will appear, select Yes to start the transfer operation.
    • The Transfer Status panel will report the results of the file transfer operation.
    • Click OK to close the SPA File Transfer Manager window and return the System Management screen.
  • Repeat the above Steps to generate and retrieve SPCollects for SPB.

You are now ready to upload the results to EMC Support for your SR.

Using PowerShell for EMC XtremIO

$
0
0

Introduction

EMC have released XIOS version 4.1.10-33 and XMS version 4.2 recently and with this release they have added PowerShell support. Being a PowerShell guy this is a good thing for automation and maintaining EMC XtremIO. In this post we will cover downloading and installing PowerShell for XtremIO and a few of the available features.

Installation

Download the PowerShell Modules for XtremIO from here https://download.emc.com/downloads/DL71129_XtremIO-Windows-PowerShell-Module-1.0.11.msi?source=OLS. You will need to have an account with EMC to be able to access the download.

Install the package. The libraries will be installed to C:\Windows\System32\WindowsPowerShell\v1.0\Modules. Now you have the PowerShell modules installed and ready to use.

Next you will need to install the root certificate from your array(s) also, to avoid any verification warnings or issues. Load the XMS splash screen and click on and install the certificate into the local Trusted Root Certification Authorities cert store.

xtremio_splash

Once you have the root certificate you need to install it into Trusted Root Certificates Authorities. Click run > mmc and press OK. Click File > Add/Remove Snapin and move Certificates to Selected snapin. When the popup appears select Computer Account, click Next.

xms cert 1

Select Computer account and click Next.

xms cert 2

Select Local Computer and click Finish. Click ok and you are ready to import the certificate.

Expand Certificates> Trusted Root Certificates Authorities and click on Certificates. Right click on Certificates and click All Tasks > Import and the wizard will start.

xms cert 3

Click the browse button and find the downloaded root certificate and select it. Click Next.

xms cert 4

Make sure it says Trusted Root Certification Authorities and click Next.

xms cert 6

Click Finish.

xms cert 7

If you have more than one XtremIO you will need to import their root certificates as well, otherwise you are done and ready to start using PowerShell for XtremIO.

Using PowerShell for XtremIO

So now we can start using some of the many cmdlets available to manage XtremIO using PowerShell.

Open a PowerShell session and load the xtremlib using import-module.

PS C:\> Import-Module XtremLib

Now we are ready to start a session to XtremIO. Using New-XtremSession we can connect to our XtremIO device.

PS C:\> New-XtremSession -XmsName cvgapemcxio01.td.afg –Username <userid> –Password<password>

Note: If you did not install the root certificate this step will fail.

Exiting a XtremSession

When you are done working on you XtremIO cluster or want to manage another cluster you must exit the session. Note when you run this command it will kill all sessions.

PS C:\> Remove-XtremSession

Check XtremIO health

PS C:\> Get-XtremClusters -Properties sys-health-state | ft –autosize

xio_health

Get a List of Storage Controllers

PS C:\> Get-XtremStorageControllers

Get Details on a Storage Controller

PS C:\> Get-XtremStorageController XIO-X1

ps_xio_sc_det

List Tags

PS C:\> Get-XtremTags

ps_xio_tags

Get Details on a specific Tag

PS C:\> Get-XtremTag -TagName SPARE -ObjectType Initiator

ps_xio_tags_det

Get a list of Volumes

PS C:\> Get-XtremVolumes

ps_xio_vol

Retrieve details on a specific Volume

PS C:\> Get-XtremVolume -VolName cvgapesx403-BOOT

ps_xio_vol_det

Note: When you see details output the left column are the properties and will allow you to fine tune your queries to exactly what you want by adding -Property <list of items comma separated>

Conclusion

We have install PowerShell for XtremIO and have explored a few of the 122 functions available. To learn what other possibilities there are available type Get-XtremHelp.


Using EMC OpenReplicator for Array based migration from VMAX to XtremIO

$
0
0

Introduction

As a Storage Administrator we are always involved in storage migrations to new hardware. They are time consuming and depending on the migration type can be difficult. EMC offers several licensed tools that can help alleviate and automate part of this process. One such tool is OpenReplicator, which we cover how to use this array based migration tool while migrating from a VMAX 40k to XtremIO system over IVR/ISL using a hot push operation.

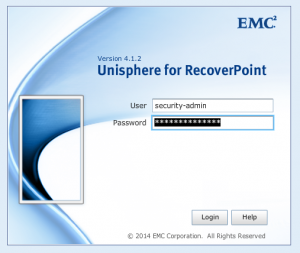
Note: If you are using RecoverPoint and the LUNs have a Device Tag of RecoverPoint you will have to stop replication and remove the Device Tag from the LUN’s as the hot push will fail.

Getting Setup

There are several steps needed to setup arrays for migration.

  • Zoning VMAX initiators to XtremIO Initators
  • Zoning for new host initiators for new storage
  • Register VMAX initiators in XtremIO
  • Create new volumes on XtremIO
  • Map VMAX initiators to new volumes
  • Create volume pairing text file for OpenReplicator

So with that we need to start getting preparations started.


Step 1 – Create IVR Zoning for VMAX to XIO X1 & X2 following your standard practice.

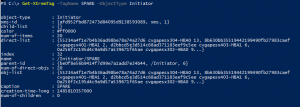
Step 2. Verify logins – Find newly logged in XIO Initiators on VMAX

$ symaccess -sid 2256 list logins | grep -i 514f0c5003a7

514f0c5003a76311 Fibre NULL NULL b7b547 Yes Yes
514f0c5003a76315 Fibre NULL NULL b7b546 Yes Yes
514f0c5003a76311 Fibre NULL NULL b7b547 Yes Yes
514f0c5003a76315 Fibre NULL NULL b7b546 Yes Yes
514f0c5003a76300 Fibre NULL NULL 45b533 Yes Yes
514f0c5003a76304 Fibre NULL NULL 45b536 Yes Yes
514f0c5003a76300 Fibre NULL NULL 45b533 Yes Yes
514f0c5003a76304 Fibre NULL NULL 45b536 Yes Yes

Step 3. Discover / Verify logins and remote port wwn from control array:

Note: You must run the commands to cause the VMAX Initiators to login to XtremIO.

$ symsan list -sanluns -wwn 514f0c5003a76300 -sid 2256 -dir 9f -p 0
$ symsan list -sanluns -wwn 514f0c5003a76304 -sid 2256 -dir 9f -p 0
$ symsan list -sanluns -wwn 514f0c5003a76300 -sid 2256 -dir 11f -p 0
$ symsan list -sanluns -wwn 514f0c5003a76304 -sid 2256 -dir 11f -p 0
$ symsan list -sanluns -wwn 514f0c5003a76311 -sid 2256 -dir 6f -p 0
$ symsan list -sanluns -wwn 514f0c5003a76315 -sid 2256 -dir 6f -p 0
$ symsan list -sanluns -wwn 514f0c5003a76311 -sid 2256 -dir 8f -p 0
$ symsan list -sanluns -wwn 514f0c5003a76315 -sid 2256 -dir 8f -p 0

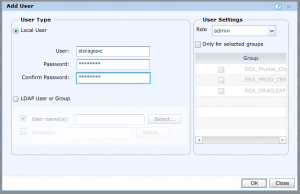
Step 4. Register VMAX  Initators on XIO and Register new Host initiators

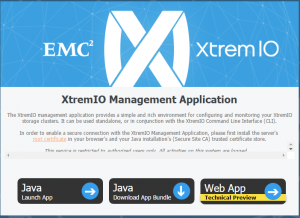
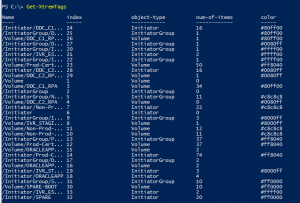
Login to XIO GUI or web interface and follow standard process to register the VMAX Initiators, tag and color code if you want.

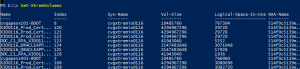
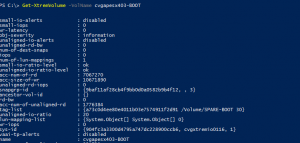
Step 5. Create volumes for server on XIO bigger than original.

Tag volumes to destination server name if you want to, this is optional, but makes it easier to manage and find volumes.
Assign VMAX Initiators to new volumes, this will create the NAA ID. Record the naa id as you will need this information when pairing later.

Step 6. Create cvgwsclu01_pair.txt for migration. This is the file needed for pairing the old to the new. Save the file to a local drive that you will be running commands from, not a mount or mapped drive, it will cause errors.

The format is #Control Device (VMAX) #Remote Device (XIO naa id)

Symdev=000195702256:1887 wwn=514f0c5139e001ae
Symdev=000195702256:1888 wwn=514f0c5139e001ad
Symdev=000195702256:188F wwn=514f0c5139e001ac
Symdev=000195702256:189E wwn=514f0c5139e001ab

At this point we are ready to create the hot push session.
Step 7. Create Open Replicator hot push session on control array VMAX using text file containing device pairing information. We are using the symrcopy command with precopy, push, hot and differential flags.

$ symrcopy create -precopy -name OR_CVGWSCLU01 -push -hot -file cvgwsclu01_pair.txt -differential -frontend_zero

Query open replicator session and verify all device pairs (Control Device and Remote Device) have status of “PreCopy”.

$ symrcopy -f cvgwsclu01_pair.txt query -detail

Continue to query the operation until 100% is showing in the output.

The Flip

We are ready to make the change to the new storage. First step is to shutdown hosts.

Check the FA ports to make sure they are not logged in. The dirports will be different for your application and sid of your VMAX will be different in the examples, change accordingly. The output will show them not logged in.

$ symaccess -sid 2256 list logins -dirport 7f:0

Activate our Open Replicator session.
$ symrcopy activate -file cvgwsclu01_pair.txt -consistent

Check Progress – Check until CTL shows Copied

$ symrcopy query -file cvgwsclu01_pair.txt -detail

Be careful setting pace as it will cause disruptions on VMAX to other datastores / LUNS accessing the VMAX. Avoid pace of 0. Default pace is 5, in this example we are changing to 3.

$ symrcopy -file cvgwsclu01_pair.txt set pace 3

Verify all device pairs are in copied state
$ symrcopy -file cvgwsclu01_pair.txt verify

Now we need to get any changes, so we will run a recreate operation with precopy
$ symrcopy recreate -file cvgwsclu01_pair.txt -precopy

Verify progress to 100% PreCopy.

$ symrcopy query -file cvgwsclu01_pair.txt -detail

Perform final activation using the consistent flag.

$ symrcopy activate -file cvgwsclu01_pair.txt -consistent

Verify all device pairs are in copied state
$ symrcopy -file cvgwsclu01_pair.txt verify

Check status if Copied now terminate the open replicator session, we are done.

$ symrcopy -file cvgwsclu01_pair.txt terminate

Should show no session
$ symrcopy query -file cvgwsclu01_pair.txt -detail

We are now compete with Open Replicator, at this point we need to remove the masking will for the servers on the old storage  on the VMAX. Remember to change the name and sid to your environment.

Remove Masking view from VMAX

$ symaccess -sid 2256 delete view -name CVGWSCLU01_CLUSTER_MV

Check device masking assignments – should be empty
$ symaccess -sid 2256 list assignments -dev 1A98

Login to XtremeIO and remove assigned VMAX ports from Volumes and assign servers Initiators to volumes.

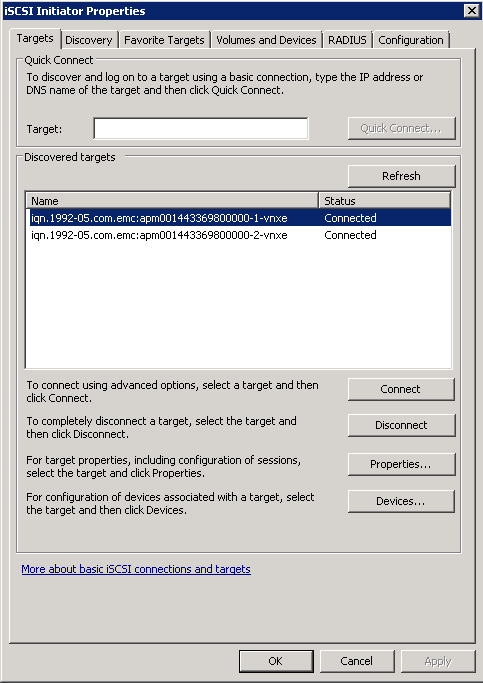
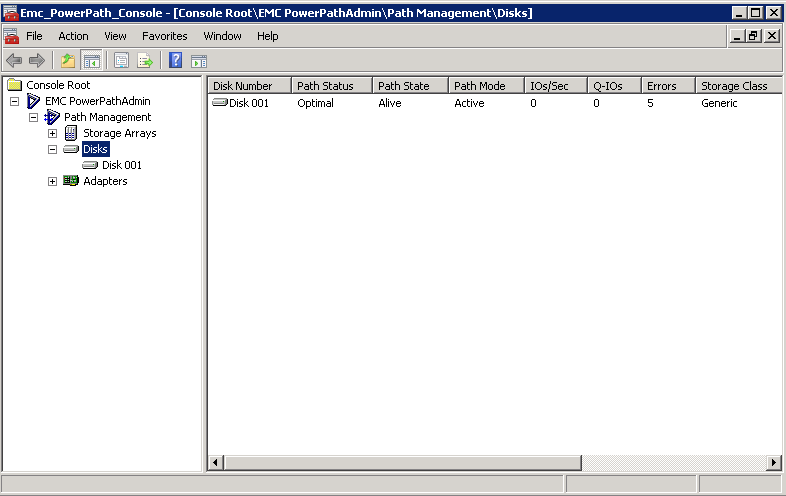
Now we can power up a server or one of the cluster nodes and verify in PowerPath that the server sees XtremIO storage only and drives are online and data in-tact.

Conclusion

As we can see we have effectively performed a OpenReplicator hot push array based migration from VMAX to XtremIO. I hope this adds another tool to your arsenal for managing and migrating data on your EMC storage!


Creating SSH Keys for User Accounts on RecoverPoint

$
0
0

Introduction

Automation can be a thing of beauty to an admin, as well as a curse. In the case of SSH Keys it is a must for running reports and commands without having to type a password. Such is the case with EMC RecoverPoint

Process

First step is to generate the private and public keys for the ID you will be using. Once you have the keys generated you will want the id_rsa.pub file.

Next, login to Unisphere for RecoverPoint as the security-admin ID, to create the ID you just generated the key for earlier.

rp_login

Navigate to Admin > Manage Users. Click Add button. Type in name and password and set the security level. Click OK when completed.

rp_idcreate

Next login ssh to the RPA Cluster using the id you just created. We are going to add the key. Type add_ssh_key and press enter.

rp_idcreate2

Enter in a name, Example: storagesvc

rp_idcreate3

Paste in the contents of the id_rsa.pub key and press Enter.

rp_idcreate4

Answer Y when prompted. You are now able to ssh without a username or password as the storagesvc account to RecoverPoint.


How To Set SNMP Forwarding on EMC Centera

$
0
0

Introduction

Recently had the task of enabling SNMP to send alerts to a Solarwinds monitoring server. This was done to enable monitoring to the in-house solution since Solarwinds itself does not support EMC Centera at the current SRM 6.6 release. In this post we will configure the service to send to the server, set a community string and set heartbeat alerts.


Version 4.2.2

Open Centera Viewer and connect to Array. Once connected open CLI.

Run show snmp command. Should show snmp not enabled or running

Config# show snmp
SNMP enabled: Disabled
Management Station: unknown:162
Community name: public
Heartbeat trap interval: 1 minute

Next run set snmp to enable snmp, set management station (target), community string and heartbeat frequency.

Config# set snmp
Enable SNMP (yes, no) [no]: yes
Management station [192.168.1.50:162]: 10.10.10.10:162
Community name [public]: storage
Heartbeat Trap Interval [1 minute]:
Issue the command?
(yes, no) [no]: yes

Rerun show snmp to see results.

Config# show snmp
SNMP enabled: Enabled
Management Station:10.10.10.10:162
Community name: storage
Heartbeat trap interval: 1 minute

Version 4.3

Commands are similar for version 4.3, instead of set snmp it is set snmp configuration.

Config# set snmp configuration
Enable SNMP (yes, no) [no]: yes
Heartbeat Trap Interval: 1
EngineID:
Management station: 10.10.10.10:162
SNMP version (v2, v3) [v2]:
Community name: storage
Issue the command?
(yes, no) [no]: yes
SNMP is successfully enabled

Config# show snmp
SNMP Configuration
SNMP Status: enabled
EngineID: not configured
Heartbeat Trap Interval: 1 minute

Configured SNMP Targets

# Address Version Identity Authenticity Privacy
———————————————————
110.10.10.10:162 v2 storage – –
———————————————————

And that is all you need to do to configure SNMP on EMC Centera.

Viewing all 23 articles
Browse latest View live